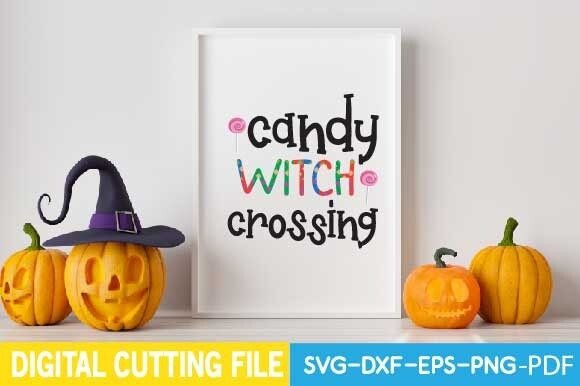
Candy Witch Crossing: An Embroidery Verdict
When a new SVG lands in my inbox, I stop looking at it as a designer and start looking at it as a production manager. The "Candy Witch Crossing" design caught my eye immediately. It has that whimsical, slightly nostalgic feel that sells well in the handmade market. But the real question is how it performs when it leaves the digital world and hits the needle. I ran this through several real project tests—tote bags, sweatshirts, baby gifts, and even a cap—and here is what I found for anyone thinking of adding it to their craft business lineup.
First Impressions and Visual Mood
The overall mood of "Candy Witch Crossing" is playful and approachable. It is not a scary Halloween witch; she feels like a character from a children’s book. That distinction matters for small shop owners. It means you can market it for fall festivals, boutique kidswear, and family matching sets without alienating customers who avoid gory themes. The silhouette is clean and balanced, which is a strong foundation for converting vector graphics into a reliable machine embroidery design. For anyone in the Crafts space, this design hits a sweet spot between seasonal and evergreen. It feels relevant for autumn but not so locked into a specific date that it won't sell after October.
Translating SVG to Stitch-Ready Results
Since this is a cutting file, the paths are optimized for a blade, not a needle. Your first job is to evaluate the vector for embroidery feasibility. The solid shapes in "Candy Witch Crossing" lend themselves well to both fill stitches and applique. In my test runs, I found that converting the larger sections into an applique design reduced stitch density and gave the project a nice dimensional texture. If you stick with standard machine embroidery fills, watch the density closely. Vector art tends to have nodes that create unnecessarily dense stitch patterns if you do not adjust the pull compensation and underlay. You want to avoid a stiff, board-like feel on fabric. I also recommend checking the detail size—if the broomstick or candy pieces are too thin, they might not register as satin stitches at a small scale. Always test the embroidery file on scrap fabric before committing to a finished product.
Tote Bags and Structured Items
This is where "Candy Witch Crossing" feels most natural. I stitched it onto a canvas tote bag, and the design held its shape beautifully. The structure of the bag supports the density well, and the whimsical graphic makes the bag feel like a premium boutique item. For small businesses or Etsy sellers, this style of tote bag design is an easy winner for fall markets. It also works well on aprons and pillow covers.
Sweatshirts and Custom Apparel
The real test was on a cozy fleece sweatshirt. Apparel decorators know that stretchy fabrics require a robust cutaway stabilizer, and this design is no exception. The satin stitch borders and filled areas need a solid foundation to prevent puckering. I adjusted the underlay to handle the nap of the fleece, and the final result was a smooth, professional piece of custom apparel. This design would also work for matching sibling sets or family holiday outfits.
Baby and Toddler Items
For baby embroidery, scale and softness are everything. I scaled "Candy Witch Crossing" down by about 30% for a toddler onesie. The details remained clear, but I switched to a lighter fill density to keep the back of the embroidery soft against sensitive skin. This is a strong candidate for personalized holiday gifts. Just be honest with your customers about sizing—a full chest design on a newborn might be too dense unless you simplify the digitizing.
Where to Use This Design Carefully
- Small Hoop Sizes (4x4): Squeezing this into a tiny hoop can muddle the witch’s features and the candy details. If you must go small, simplify the pathing and increase the stitch length to avoid thread buildup.
- Curved Surfaces like Caps: Baseball caps and beanies do not love wide fields of dense fill stitches. If you digitize this for a cap, consider breaking up the fills with more satin accents or running stitches to reduce the stiffness.
- Very Lightweight or Thin Fabric: The density required to replicate the vector look can pull on delicate fabric. Stick to medium-weight canvas, denim, fleece, or sweatshirt material. Use a heavy tear-away or cutaway stabilizer.
- Dark Fabric with Dark Thread: Black on black can kill the design’s visual appeal. If you are stitching on dark fabric, plan your thread palette around high contrast—neon green, bright purple, or soft cream outlines will make the witch pop.
Thread Palette and Production Efficiency
One of the strengths of "Candy Witch Crossing" is that it works well with a limited thread palette. I used a purple for the hat, a soft peach for the face, bright green for the candy accents, and white for the highlights. Keeping it to four or five thread colors reduces production time and makes the design more profitable for small shop owners. Fewer color changes mean faster stitch-outs, which matters when you are fulfilling Etsy orders or stocking a craft fair booth. The design decisions in the original Graphics file translate well into an efficient embroidery workflow.
Practical Notes for Sellers and Digitizers
Before you sell a finished product using this design, check the commercial licensing that came with your SVG download. Most allow physical product sales, but if you plan to sell the digitized embroidery file itself, you likely need an extended license. That is a critical step for any digital product seller. I also recommend creating a clean printable mockup of the stitched design for your online listings, so customers understand the scale and placement. The vector lines in "Candy Witch Crossing" are crisp enough to use in those mockups without rework. Also, test the design on black and white paper first to visualize where the negative space works and where it might fall apart. Good negative space makes a machine embroidery design breathable and wearable.
Final Verdict for Your Craft Business
"Candy Witch Crossing" is a versatile and marketable graphic for the embroidery world. It fits squarely into the fall and Halloween season but leans cute enough to appeal year-round for witch-themed boutique shops. It requires thoughtful digitizing—especially if you are converting it from an SVG to a filled embroidery file—but the effort pays off in a finished product that feels polished and professional. Whether you are making a personalized tote bag, a sweatshirt for your small shop, or a set of embroidered pillows for a holiday market, this design has strong potential. Just respect the fabric, test your stabilizer, and adjust your density. This little witch is ready to cross into your production line.